Stage 1:
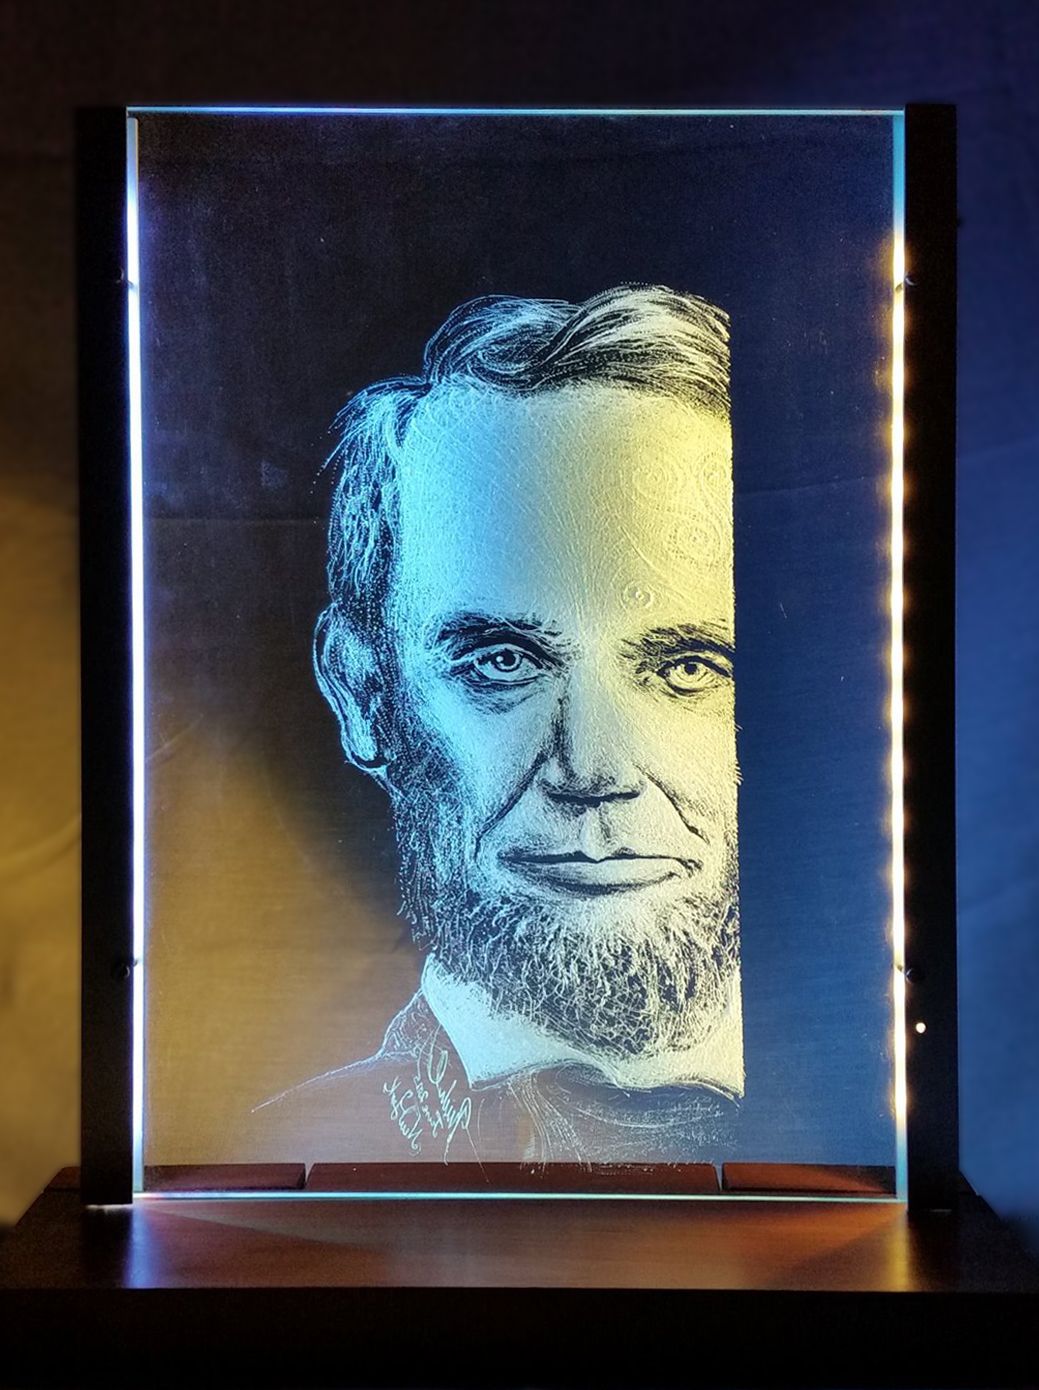
Lincolnator began as a experiment for me to see what it was like creating a portrait with a hand-held Dremel engraving tool and diamond bits on hardened glass...
... A LOT of fun! While difficult at first to judge rotation speed and tip pressure, I soon was getting into it. I even wound up giving him a New Zealand flourish with koru designs layered within the base etching.
Stage 2:
After the success of the original etching and aesthetic lighting, I wanted push the possibilities further within the work.
As in a lot of my practice, my next thought was to include some temporal/animated elements using the popular Arduino platform as the onboard microprocessing controller.
Arduino is an open-source microcontroller that allows engineers, artists and curious folk to write their own looping programs and upload them to the board. The idea is that the board has inputs and outputs and the program works with these to do stuff.
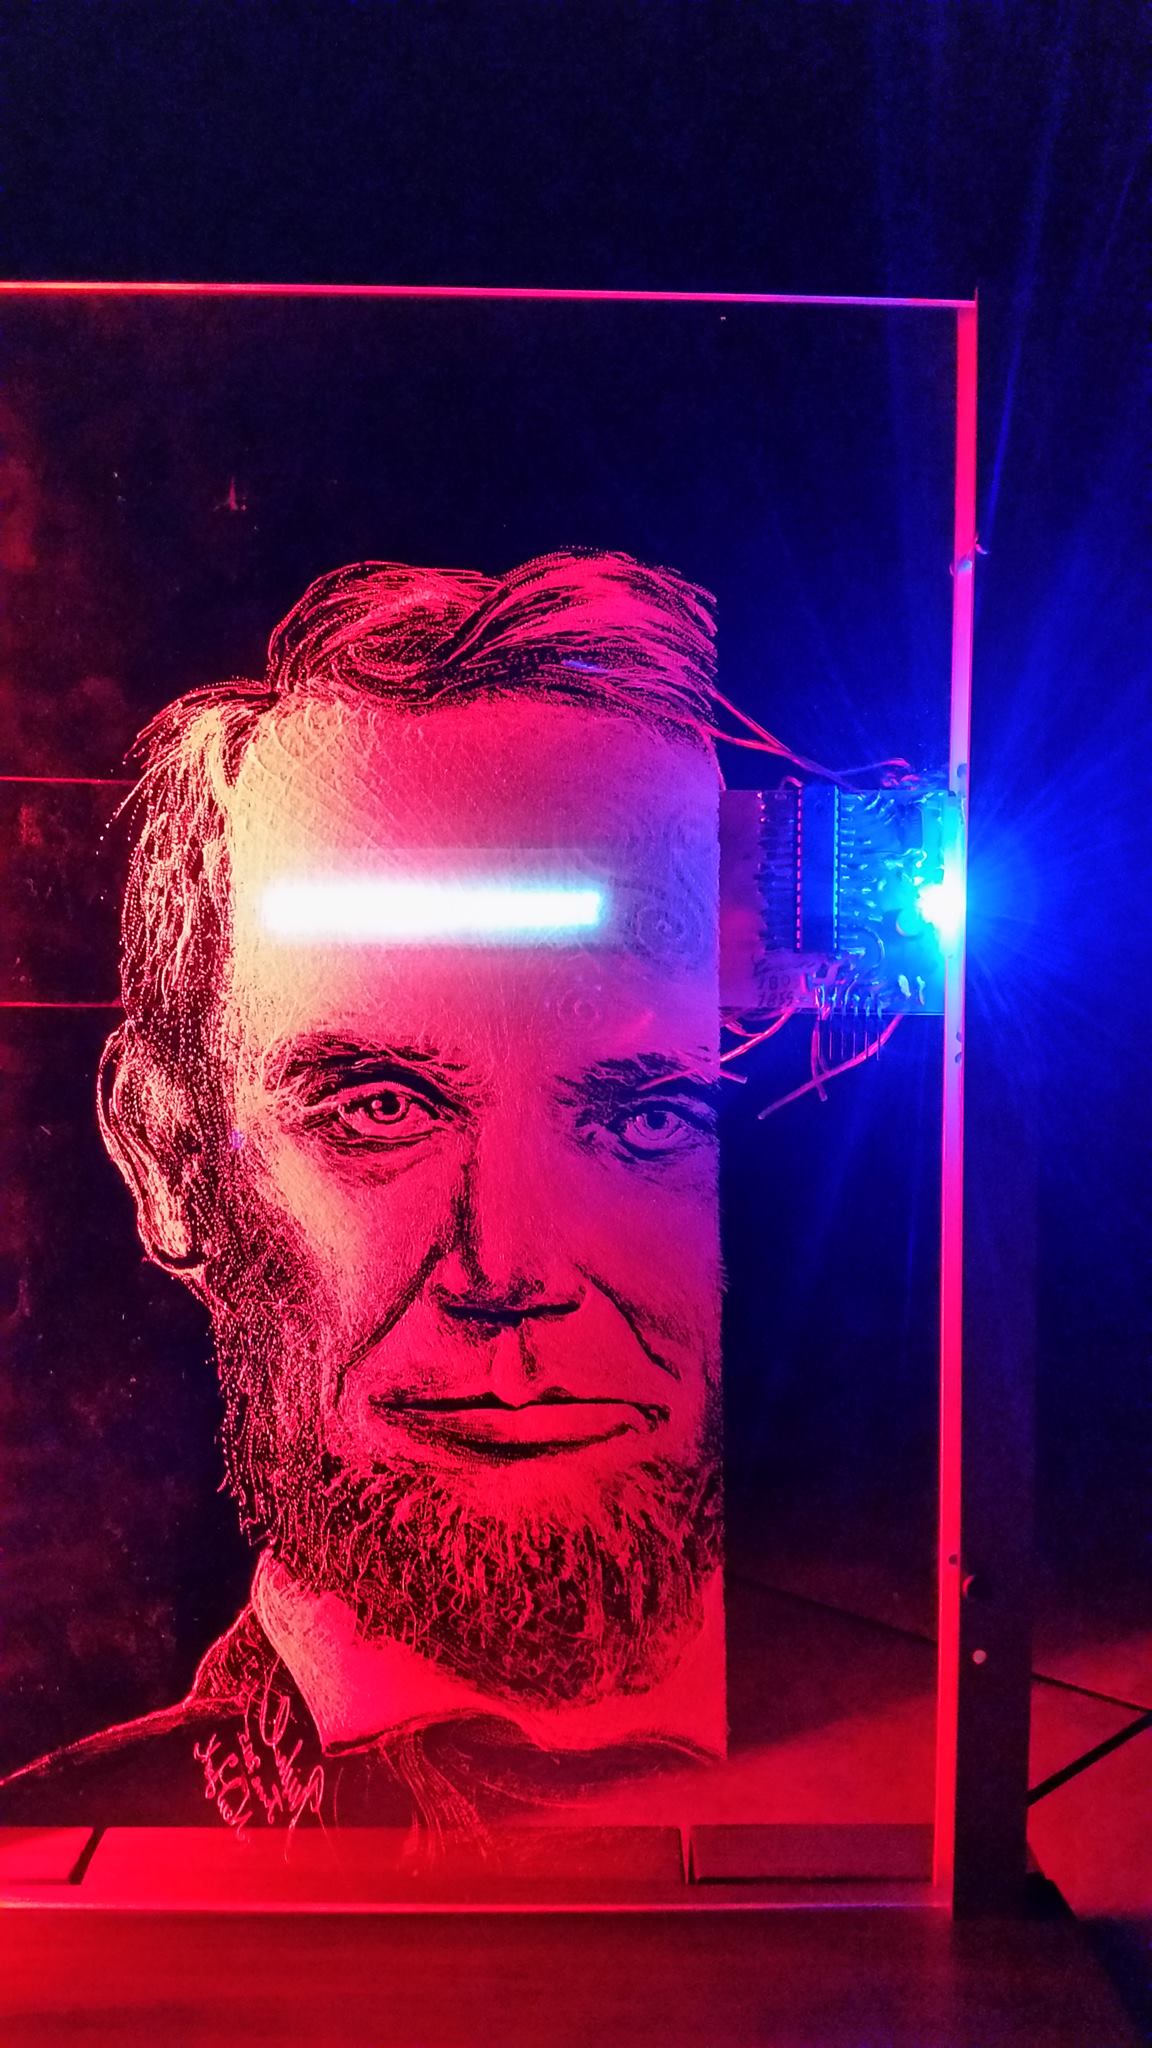
A core element of my practice is the DIY re-engineering of the physical Arduino circuit board into custom aesthetic designs. These are integral and complement the overall format of the artwork, yet retain all the programming potential of the commercial circuit boards. I strive to push what's possible with these designs and some are so abstract, they originally appear to the viewer as just sci-fi artifacts, rather than functioning micro-computers. This has the effect of surprising the viewer once they ascertain what's really happening within the powered work.
In Lincolnator, this stylistic element wasn't planned from the outset, as this was mainly intended as a glass engraving experiment. It exceeded my expectations and has ended up as exhibited art, but with the circuit being added as a secondary part of the project.
Stage 3:
More refinements were added, such as fine tuning the text on the retro-style L.C.D. display mounted in behind Lincoln's forehead (rescued from an old '80's stereo) which scrolls any message uploaded in the C/C++ program loaded onto the circuit.
Pushing Further:
I wanted the ability to switch between a few different looping programs without the need to attach the work via USB to a PC and uploading them each time, so a rotating knob (also circa '80's stereo) was added. This is a "potentiometer", where 5 volts DC is feed into one terminal and by rotating the knob (wiper) electrical resistance is increased or decreased, outputting a voltage range of between 5 to 0 volts. The circuit board's input pin takes that analog value and coverts it to a digital value which then can be read during the execution of the main loop, thus triggering which sub-program to run.
There's one other material feature of this work which will not be evident unless highlighted and that is the unique New Zealand Kauri wood which serves as the base. Not only is this material a joy to carve with rich Whitebait iridescence, but it is also the oldest workable wood in existence ~ at 50,000 years old.
Below is detail of LCD screen in operation. Here is it programmed to scroll the first sentence of President Lincoln's historic Gettysburg Address. It does scroll from the right to the left - a direction chosen to enhance its readability, not done as political commentary ;)

Overall, the sculpture has been received excellently well and was featured at the "Hidden Talents" art show at Pace University's Choate Gallery, Pleasantville, New York on Thursday November 14th, 2019 to critical acclaim.
Lincolnator as featured in the "Hidden Talents" art exhibition at Pace University, New York, November, 2019. The work was programmed to a 60 second loop with scrolling text, sound and LED lighting animation. It was received excellently well and generated a lot of interesting conversation. To the right is "Cardy" a more traditional acrylic work I exhibited alongside Lincolnator's technology.
To finish up, the below Arduino code in C/C++ is Blink a "Hello World" example of the simplest program that when uploaded to the Arduino microprocessor and run, causes the onboard LED to light for 1 second then turn off for a second, repeatedly until the board is powered down. The code for Lincolnator was created in the same IDE and language.
Below is a the very basic code example that makes an LED blink every second attached to an output pin on an Arduino board:
/*
  Blink

  Turns an LED on for one second, then off for one second, repeatedly.

  Most Arduinos have an on-board LED you can control. On the UNO, MEGA and ZERO
  it is attached to digital pin 13, on MKR1000 on pin 6. LED_BUILTIN is set to
  the correct LED pin independent of which board is used.
  If you want to know what pin the on-board LED is connected to on your Arduino
  model, check the Technical Specs of your board at:
  https://www.arduino.cc/en/Main/Products

  This example code is in the public domain.

  http://www.arduino.cc/en/Tutorial/Blink
*/

// the setup function runs once when you press reset or power the board
void setup() {
  // initialize digital pin LED_BUILTIN as an output.
  pinMode(LED_BUILTIN, OUTPUT);
}

// the loop function runs over and over again forever
void loop() {
  digitalWrite(LED_BUILTIN, HIGH);   // turn the LED on (HIGH is the voltage level)
  delay(1000);                       // wait for a second
  digitalWrite(LED_BUILTIN, LOW);    // turn the LED off by making the voltage LOW
  delay(1000);                       // wait for a second
}